
Exhibitor FAQs
Here is a short video guide as well as a 'pdf' to help you set up your virtual booth.

Below is a list of frequently asked questions about the virtual edition of Global Health
- Click on one of the questions to view the answer
Global Health Exhibition - The Virtual Edition will take place from 7-10 December 2020 on an AI-powered and award-winning networking platform.
The virtual expo will run from 9:00AM - 7:00PM AST (GMT+3) = Arabia Standard Time
You can easily exhibit on the virtual edition of Global Health by purchasing an entry starting from $1,500. Start by filling up a form here or contact us on [email protected]
Once you have completed the process advised by your sales representative with Informa Markets, you will receive an email from [email protected] with your login details and a link to the virtual expo.
Upon successful registration for Global Health Exhibition - The Virtual Edition, a personalised link will be sent to your registered email from [email protected], click the link to acess your pre-created profile on our virtual event paltfrom.
Our AI powered platform collects demographic information such as your Job function, Industry, categories of products you are interested in as well as your main objectives of attending the show. This information is used by the system to bring up recommendations of exhibitors, representatives, sessions or products that match your preferences.
How to update my information?
With LinkedIn :
It's really easy to import your profile information from LinkedIn. In fact, by synchronizing your profile with LinkedIn, the app imports your profile picture, job title, company and biography. To allow the LinkedIn sync, click on "My profile", then click on your name and click on the LinkedIn button.
Manually :
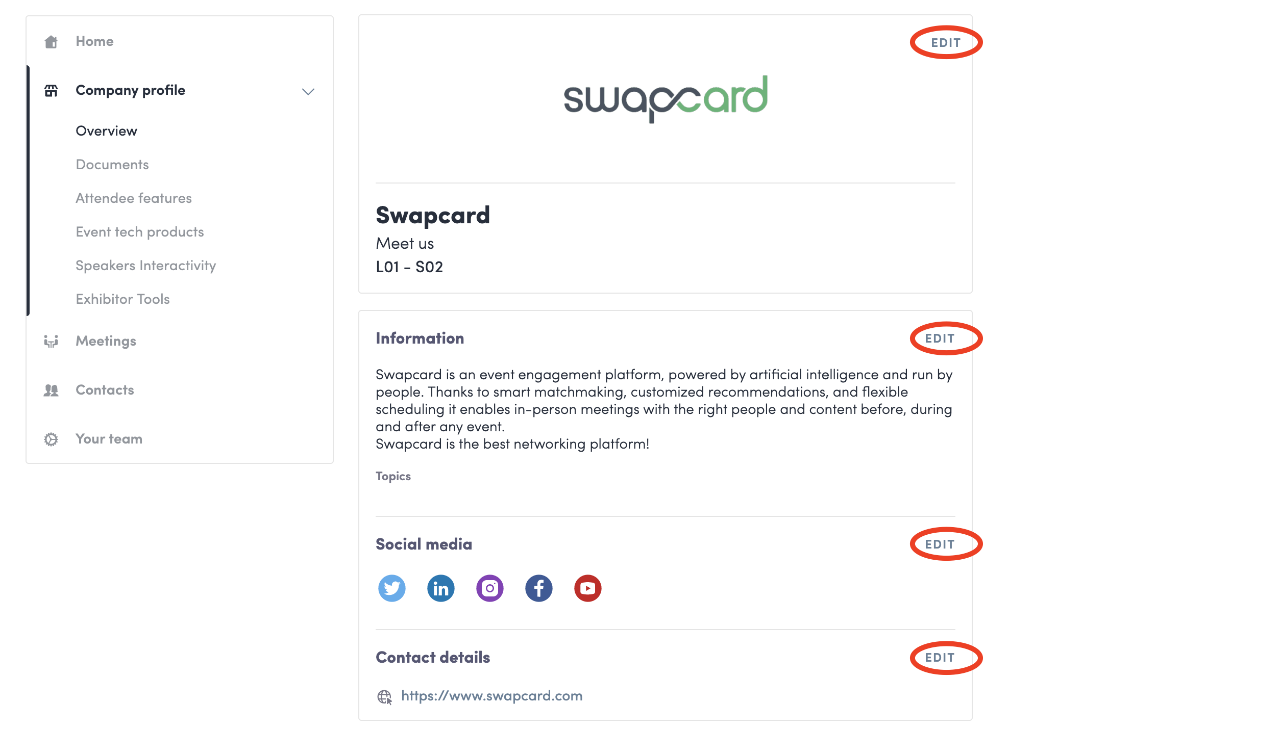
On our virtual event platform (app.swapcard.com), click on your name at the top of your screen, then click on the edit button on the side of the fields you want to modify. Once you have finished updating your information, click on the green tick in order to save your modifications.
To note : Press "Enter" after each skills in order to create them.
The company profile corresponds to your company's details that is visible to all the attendees. It includes:
- A company or organization name
- A logo
- A description
- One or more topics (defined by the organizer)
- A type of company
- The exhibitor location on the event
- One or more social networks
- A website link
- An email address
- One or more links
- One or more documents (optional)
- One or more products (optional)
- And any other information that the organizer wishes to make visible to the participants
The different team members attached to your company will also be displayed on the company profile, as well as the program sessions sponsored by the company.
The "Products" feature of the Exhibitor Center is very useful to highlight all the products and services you offer. To add one or more items to your Company profile, do the following:
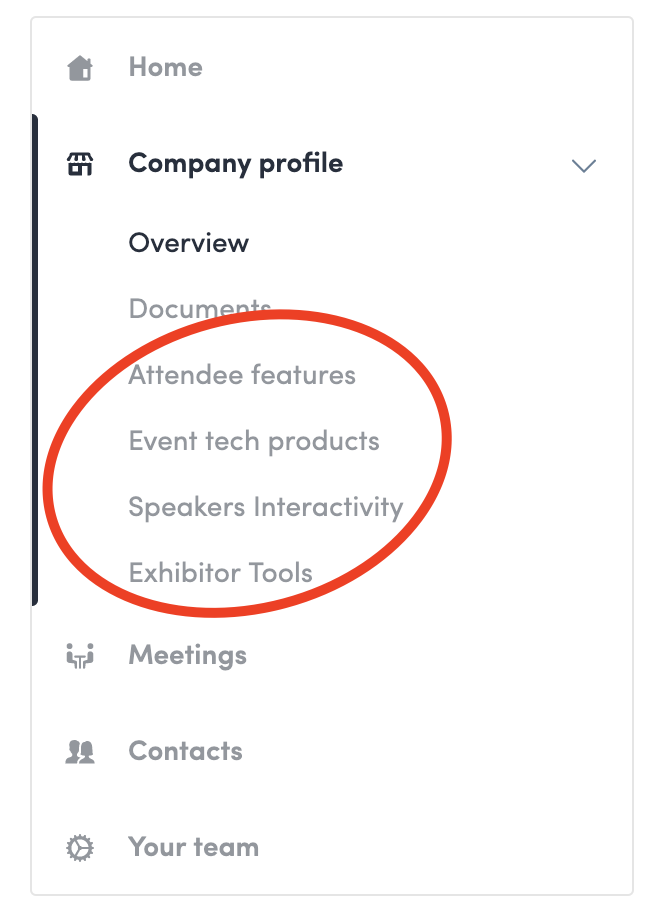
- Go to your "Exhibitor Center" from your computer or mobile phone
- Click on "Company profile" in the left side menu
- Below "Documents", you will see a list of the product categories available for your event: click on the category of your choice to modify its content
- To add a new product, click on "Add" at the top right of your screen
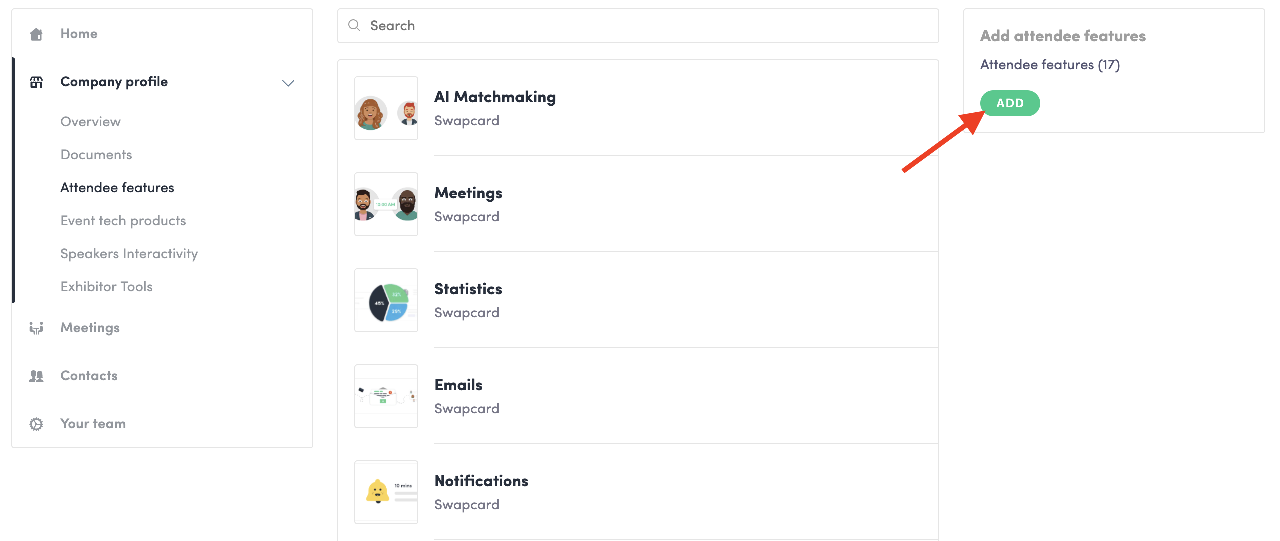
5. Enter a name and description (optional) before validating. The product editing window will appear so that you can add photos, a link, a subcategory, a brand,...

Complete as much information as you can to get your products to the top of the list and set you apart from other exhibitors!
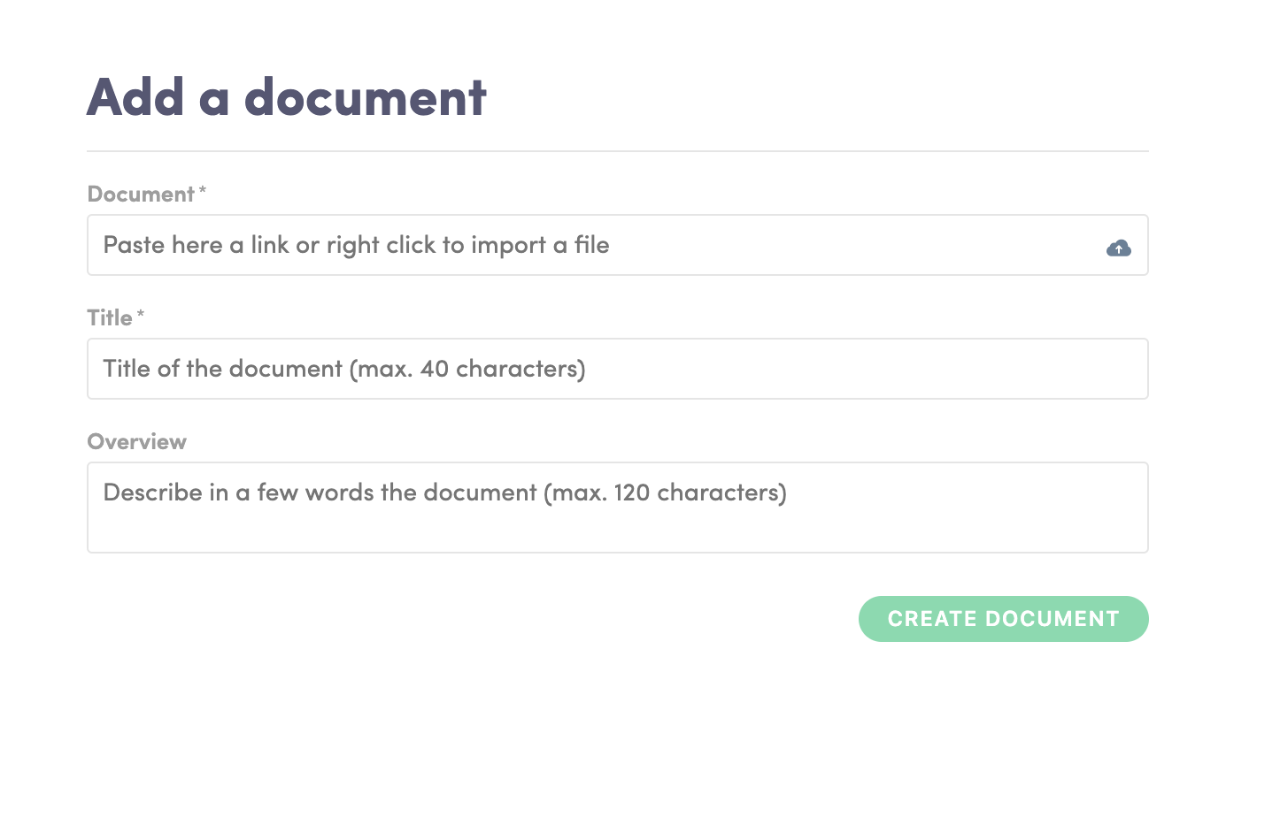
Adding documents to my company file is easy:
1. Go to the "Company Profile" > "Documents" section of your Exhibitor Center.
2. Click on "Add Documents" on the right of your screen.
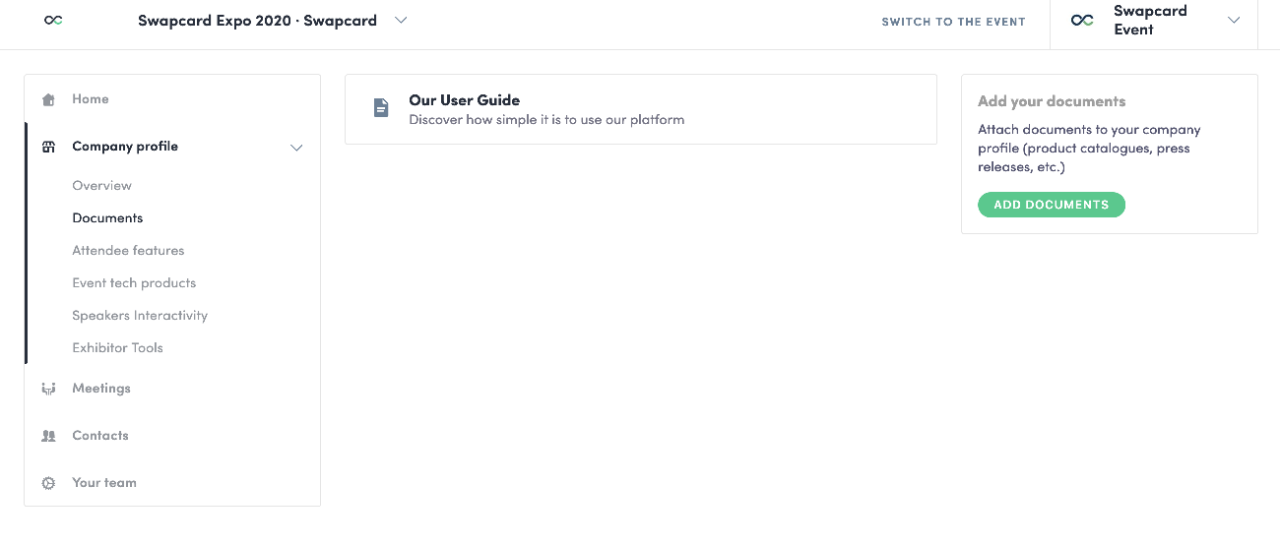
3. Paste the link of the document concerned or click on the cloud to import a file from your computer.
4. Give the document a title (mandatory) and a description. Be careful to respect the maximum number of characters for each field: 40 for the title, 120 for the description.
5. Your document is now accessible from your company's profile!
Adding members to an exhibiting organization give them several privileges:
- be able to modify their company's page
- be able to answer and assign the meeting requests received
- be able to share with other members the contacts made during the event
There are two ways to associate members with an exhibitor.
1) Manually (quick add)
- From the organizer interface, click on one of the exhibitors and go to the "Members" tab.
- A drop-down menu then offers you the opportunity to choose among the participants already registered in the platform
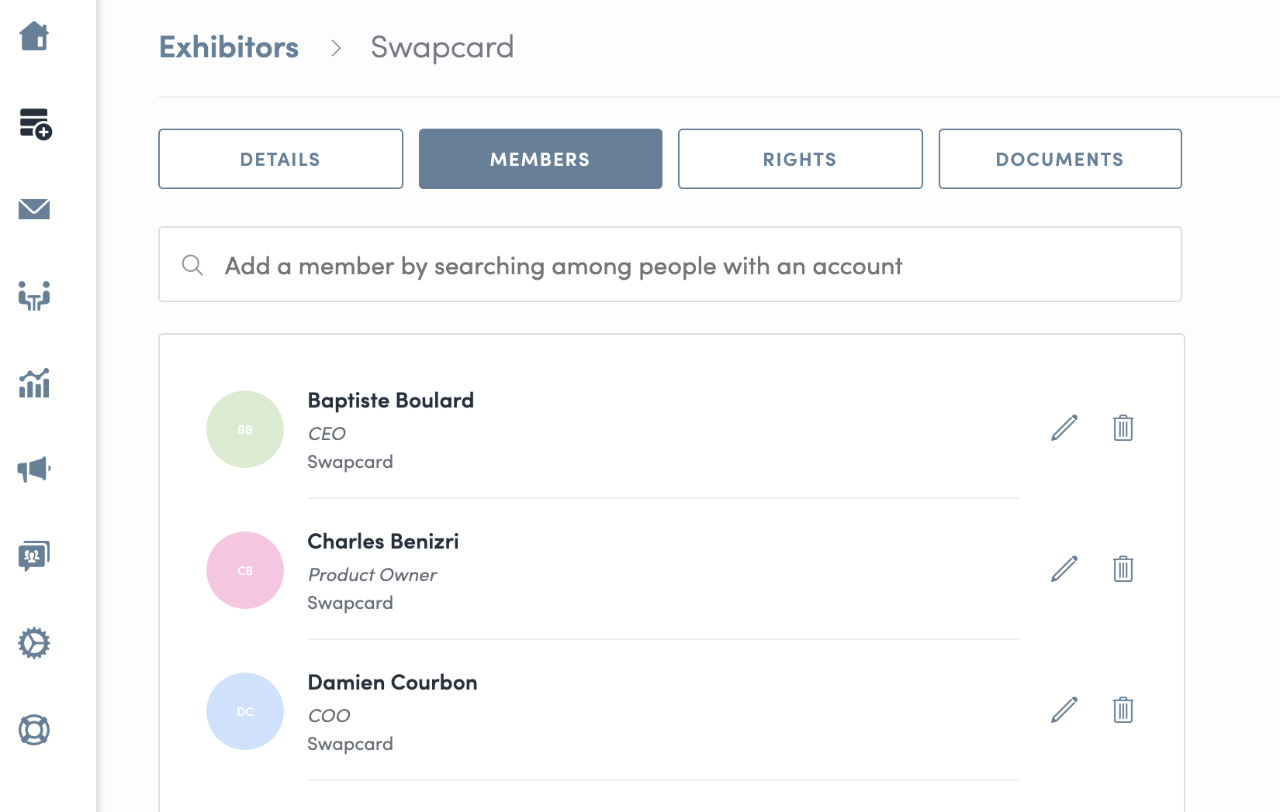
Note: The members need to have been created as attendees beforehand.
2) By Excel import (mass add)
- From the organizer interface, go to the "Event Data > People" tab and click on "Add people".
- Choose "Import via Excel file", select "Exhibitors" and click on "Download".
- Add your members as basic participants.
- In the AD column, indicate the ID of the exhibitor to which you wish to attach this member. You will find the corresponding ID for each exhibitor on the 3rd page of this Excel file ("Exhibitors (read only)").
- You can now import your file!
Note: The exhibitor entities must have been created beforehand.
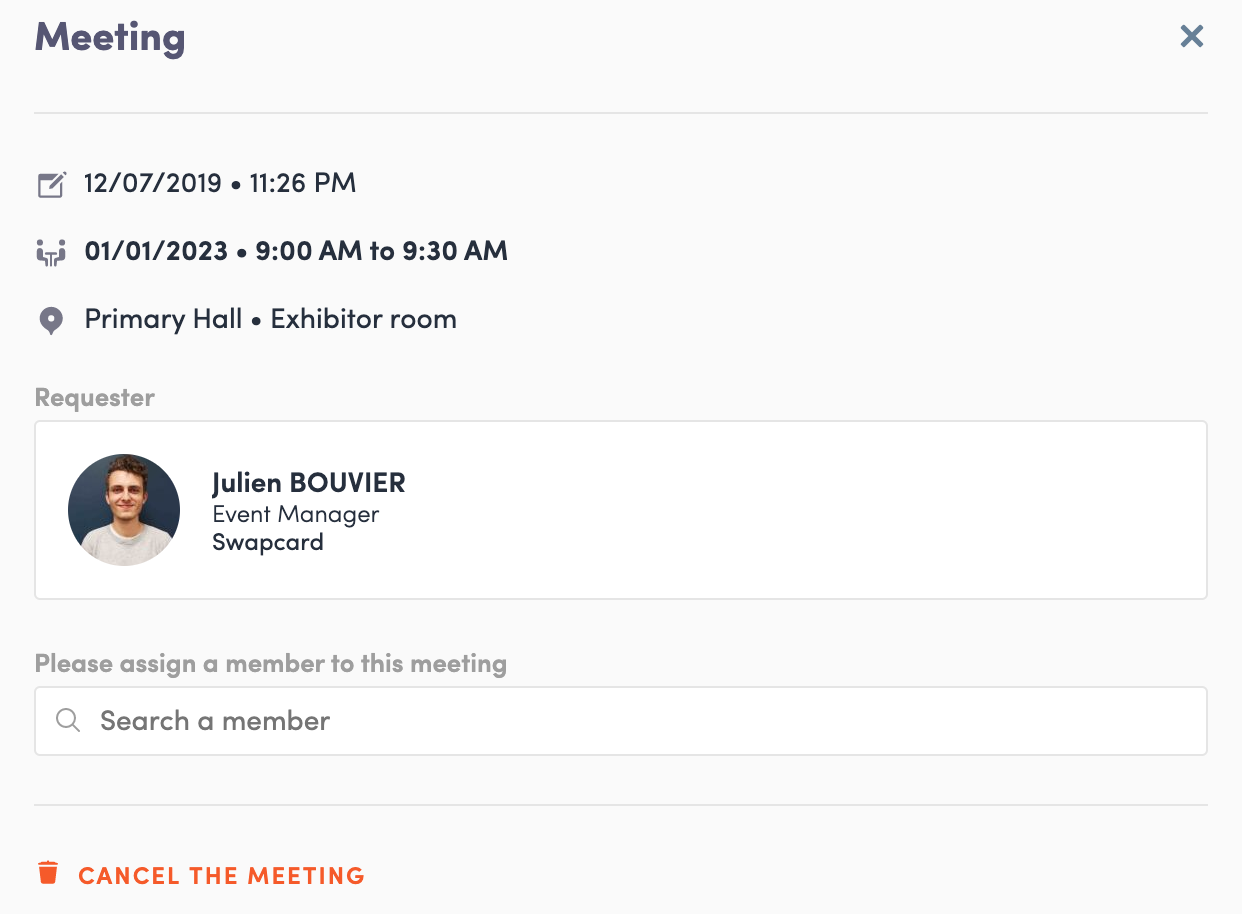
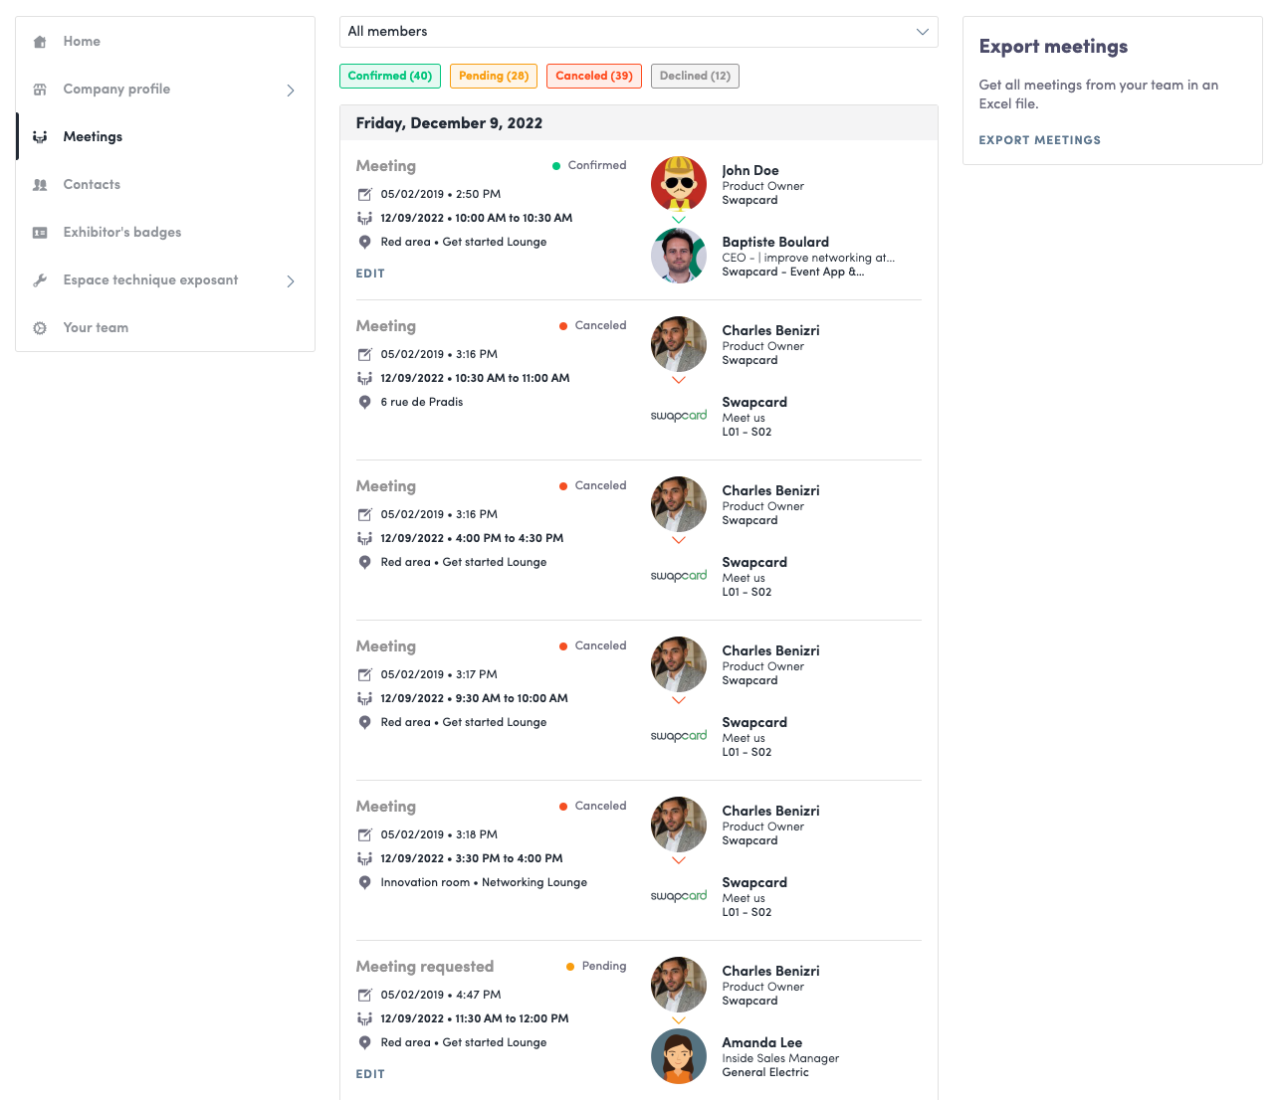
To assign a meeting to a member of your team, simply go to the "Meetings" section of your Exhibitor Center then click on the meeting of your choice: select the collaborator of your choice by typing the first letters of his first name in the field "Please assign a member to this meeting", then click on "Accept".
In your exhibitor center, you can find all the meetings related to your company: Exhibitor center > Meetings.
These can appear under different status:
- Invitation: received meeting request to which you must reply
- Confirmed: meeting request accepted
- Waiting: meeting request sent by a member of my company, waiting for an answer
- Canceled: meeting cancelled
- Declined: declined meeting request

You can see your pending or confirmed meetings in the My Visit button and then by clicking on the Meetings tab.
You can cancel a confirmed or pending meeting by clicking on Cancel meeting request (if it was pending) or Cancel meeting (if it was confirmed).
You will also be able to decide on your availability in this tab.
For example, if you want to make yourself unavailable on certain meeting slots created by the organizer of your event, simply click on Make unavailable.
Unavailable slots will no longer be displayed on your profile and other participants will no longer be able to send meetings requests for these slots.
Simply click on Make available to make available a slot that you had put unavailable.
Note: Unavailable slots will appear grayed out in this tab.
Participants in an event can request meetings with exhibitors. When you receive a meeting request, you have the option to accept or decline it. All requests received appear in your Exhibitor Area, in the "Meetings" tab.
When you click on the request, you can:
- Accept
- Accept by assigning the meeting to a member of your team
- Decline
It is not possible to change the date or time of a meeting. To do this, you must cancel and then send a new meeting request.
However, from your exhibitor center, you can change the person assigned to the meeting. To do this, click on the meeting, then on the name of the person assigned. You can now enter the name of the new person assigned.

For further enquiries please email [email protected]
Supported by


_page-0001.jpg)


.png)